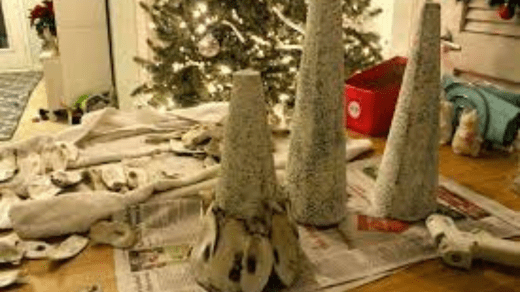
Creating an oyster shell Christmas tree is a unique and coastal-inspired holiday decoration. It’s a creative way to celebrate the holiday season with a touch of coastal charm. Here’s a step-by-step guide on how to make an oyster shell Christmas tree:
Materials You’ll Need:
- Oyster shells (cleaned and dried)
- Small foam cone or cone-shaped floral foam
- Hot glue gun and glue sticks
- Craft paint (optional)
- Paintbrush (optional)
- Decorative items (beads, faux pearls, small ornaments, etc.)
- Star topper (optional)
- Ribbon or twine for hanging (if desired)
Instructions:
1. Prepare the Oyster Shells:
- Ensure that your oyster shells are clean and thoroughly dried. If they are not already cleaned, scrub them gently to remove any residue. You can collect oyster shells from the beach or purchase cleaned ones from a craft store.
2. Paint the Oyster Shells (Optional):
- If you want to add a touch of color to your oyster shells, you can paint them using craft paint. Choose colors that complement your holiday decor. Allow the paint to dry completely before proceeding.
3. Attach the Foam Cone:
- Place your foam cone on a stable surface. If it’s too large, you can trim it to your desired size using a sharp knife.
- If you’re using a foam cone, attach it to a sturdy base or a piece of cardboard for stability.
4. Start Gluing Oyster Shells:
- Begin at the base of the foam cone.
- Apply hot glue to the back of an oyster shell and press it onto the foam cone, starting at the bottom. Hold it in place for a few seconds until the glue sets.
- Continue gluing oyster shells side by side in rows, working your way up the cone. Overlap the shells slightly to create a layered effect.
5. Build the Layers:
- As you move up the cone, create concentric rows of oyster shells. The shells should get smaller as you go higher up the tree to achieve a tapered tree shape.
6. Fill in Gaps:
- If you have gaps or spaces between the oyster shells, fill them in with smaller shells or decorative items like beads or faux pearls. Glue them securely in place.
7. Add Decorative Items:
- Decorate your oyster shell Christmas tree by gluing small ornaments, beads, or other decorative items onto the shells. Get creative and personalize it to your liking.
8. Optional Star Topper:
- If you’d like to add a star topper to your tree, attach it to the top of the foam cone using hot glue.
9. Let It Cool and Set:
- Allow the hot glue to cool and set completely before moving or handling the oyster shell tree.
10. Finish and Display:
csharpCopy code
– Once your oyster shell Christmas tree is complete, you can display it on a tabletop, mantle, or any other location where you want to add a coastal holiday touch.
11. Add Hanging Option (Optional):
vbnetCopy code
– If you want to hang your oyster shell tree as an ornament, attach a loop of ribbon or twine to the top, securing it with hot glue.
Your oyster shell Christmas tree is now ready to be a charming addition to your holiday decor. It’s a unique and coastal-inspired way to celebrate the season.

